

In regions where email marketing hasn’t yet become mainstream, brands continue to rely heavily on transactional emails—and for good reason. These emails are crucial touchpoints. They get noticed and opened more often than standard marketing emails, simply because they’re “transactional”.
Whenever money changes hands, one naturally pays more attention.
In fact, according to the Klaviyo benchmarks report (2025), the open rate of transactional emails, across all industries, is more than 60%.
But if email marketing is a core part of your business strategy, sending out default, generic emails just won’t cut it. You understand the impact of a well-crafted email experience. That’s why, in this guide, we’ll walk you through how to customize WooCommerce email templates for your brand.
Design and development are where we shine, and we bring over 12 years of experience to help you elevate your email marketing game.
If that’s what you’re after, you’re in the right place. Let’s jump right in!

How to Customize WooCommerce Emails
1. Use WooCommerce’s Editor
To kick off with the basic design part, you can use WooCommerce’s built-in drag-and-drop functionality to customize templates.
Go to WooCommerce, click Settings, then select Emails. Next, select Email Customizer in the dropdown, and click Customize.
You’re ready to customize emails with your brand assets.
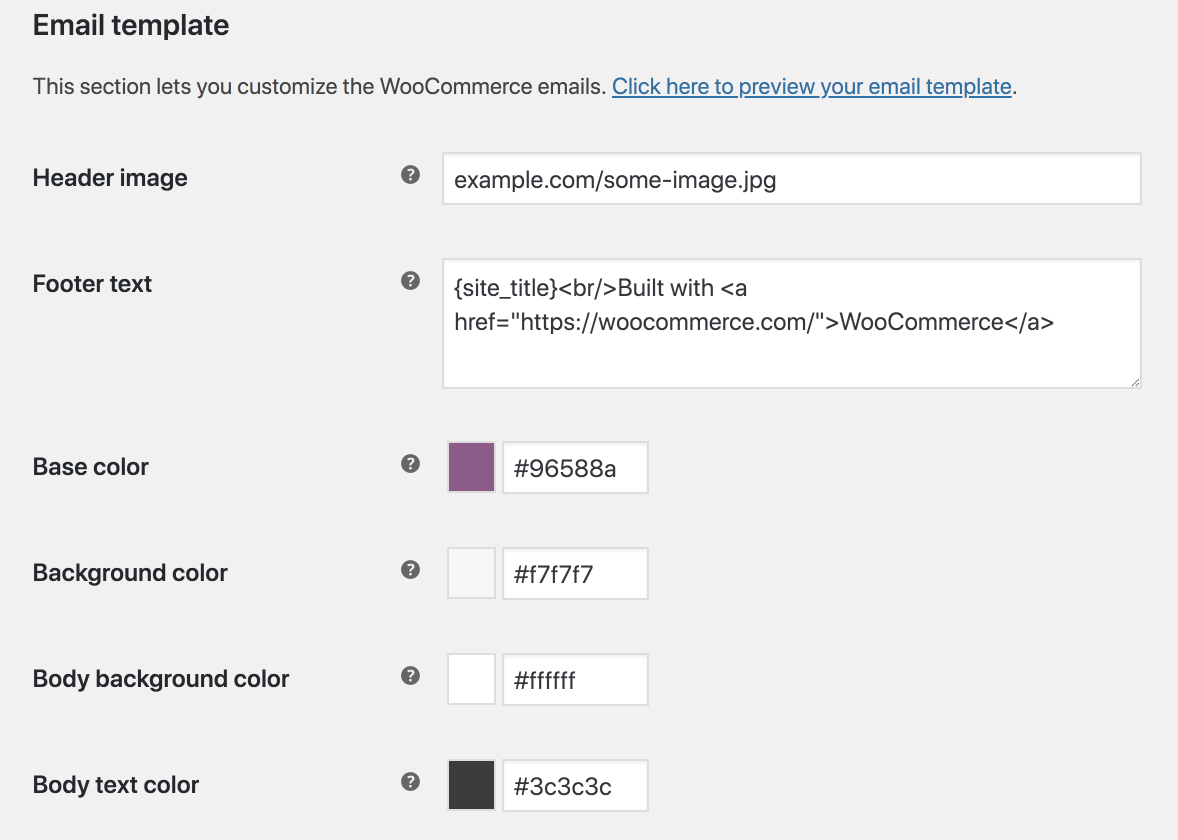
From header to CTA buttons to social media icons, you can customize your transactional emails so that they all reflect your brand identity.
Incidentally, you can utilize plugins to enhance email designs.
Some of the most popular plugins include the Email Template Customizer for WooCommerce, MailPoet, and Metorik.
2. Add Custom Content
A custom placeholder is where you can add a specific type of content for your customer. It will be unique for each customer.
WooCommerce offers a wide range of custom placeholders such as:
- {order_number}
- {order_date}
- {customer_first_name}
- {_payment_method}
- {customer_last_name}
- {customer_note}
The below image shows how a customer’s first name is added to the subject field. This is simple personalization.
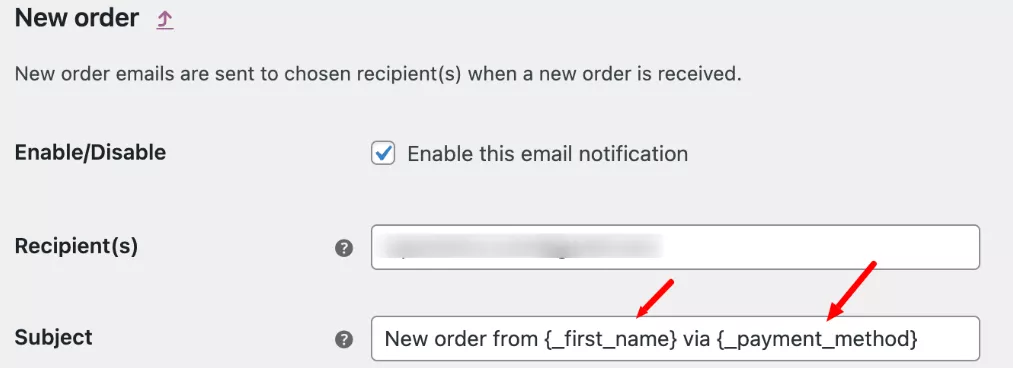
Follow the steps outlined in the previous section. Select your template, and as shown above, enter your instructions in the subject field.
Related: How to Use Dynamic Content in Emails
3. Customizing Product-related Emails
You can leverage product descriptions to customize the WooCommerce email templates. Click Products, find the product item, and hit Edit.
In the product data section, select Advanced.
From here on, you can add product descriptions to include almost anything to promote customer loyalty.
Below, you can see how a Thank You note can be added.
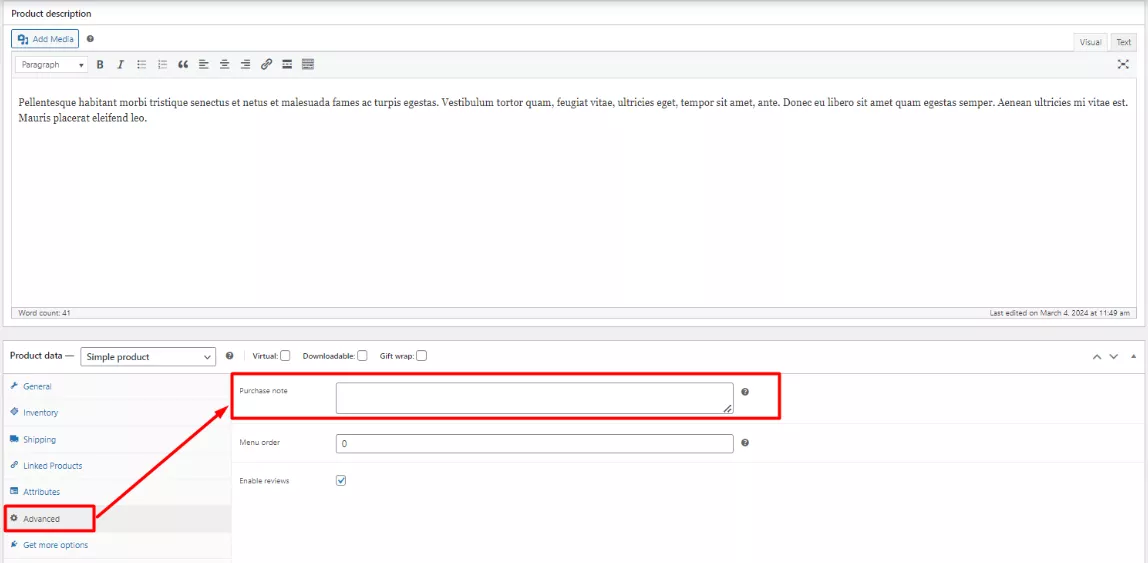
A post-order Thank You note goes a long way in building customer loyalty.
4. Use Code to Customize Emails
To achieve maximum customization, you can edit WooCommerce templates with coding. For example, you can choose to edit specific sections within your template through PHP as shown below:
- email-header.php: for editing email headers
- email-footer.php: for editing email footers
- customer-note.php: for an email when a note is added to the order
- customer-invoice.php: for editing invoice content
But unless you’re a developer, you can’t utilize this method. As a result, you’ll have to make do with the features available in the editor.
You could also customize emails with WooCommerce hooks. WooCommerce has two kinds of hooks, action hooks and filter hooks. For instance, the following PHP code is used to fetch order-related data for dynamic content.
<?php
add_action( 'woocommerce_email_before_order_table', 'mm_add_greeting_below_header', 10, 2 );
function mm_add_greeting_below_header( $order, $sent_to_admin ) {
    if ( ! $sent_to_admin ) { // Only show to customers
        $user = $order->get_user();
        $greeting = $user ? sprintf( 'Hello %s,', $user->first_name ) : 'Hello Customer,';
        echo '<p style="margin-bottom: 20px;">' . esc_html( $greeting ) . ' Thank you for your recent order!</p>';
    }
}
?>
The action hook ‘woocommerce_email_before_order_table’ places the content just before the list of ordered items.
But once again, you’ll need developer help for all this.
Related: Design to HTML: Email Coding Best Practices
WooCommerce Email Design Best Practices
To create a seamless transactional experience, follow these WooCommerce email design best practices:
- Keep all transactional emails short and to the point. As a rule of thumb, the recipient shouldn’t have to scroll more than once.
- Resist the temptation of neglecting the subject line and pre-header just because such emails get opened. Instead, make it unique to stand out from similar notifications from other brands.
- You may or may not use images. But if you do, avoid all-images like the plague. Incorporate real text in between images.
- Stick to your brand identity. In the case of transactional messages, you’d chiefly focus on brand logo and brand-optimized CTA button.
- Enable tracking within the email. Place the tracking CTA above-the-fold.
- If you wish to add animated GIFs, add just one and keep it simple.
- Remember to optimize the emails for Dark Mode.
- Whether or not you want to add hero images is up to you. Many lifestyle brands use rich hero banners. But it’s nothing etched in stone.
- Make sure the links are working and redirecting to the right pages. Test the CTA buttons in particular.
So far, so good. But where can you customize WooCommerce emails? Turns out there are many tools for WooCommerce email customization.
Here are some of the most popular WooCommerce customization tools:
- WP HTML Mail
- Metorik
- MailPoet
- YayMail
- Decorator
- WooCommerce Email Template Customizer by Villa Theme
- Kadence WooCommerce Email Designer
- WooMail
- Email Customizer for WooCommerce by ThemeHigh
- FlyCart

Need help with designing custom or modular email templates? Let’s shake on it!
Ensure your emails render seamlessly, with Email Mavlers — flawless on every device, from mobile to desktop to tablets. We’ll get around CSS complexities to deliver pixel-perfect templates across clients. Also enjoy optimized images for smooth display, fast-loading clean code for reliability, and accessible, inclusive designs.