

Modern email marketing isn’t just about sending messages. It’s about delivering content that is personalized, flexible, and easy to adapt across devices.
For many, that often means depending on email developers for templates.
But with snippets in Customer.io, you can build modular templates that are reusable, scalable, and customizable without really needing to code.
So let’s find out how to create advanced snippet templates in Customer.io. We’ll journey through three major stages: coding, uploading, and deploying.
This roadmap will ensure a smooth path as you create modular email templates.
What are snippets in Customer.io?
Snippets are common content blocks that can be reused across multiple campaigns, messages, and channels.
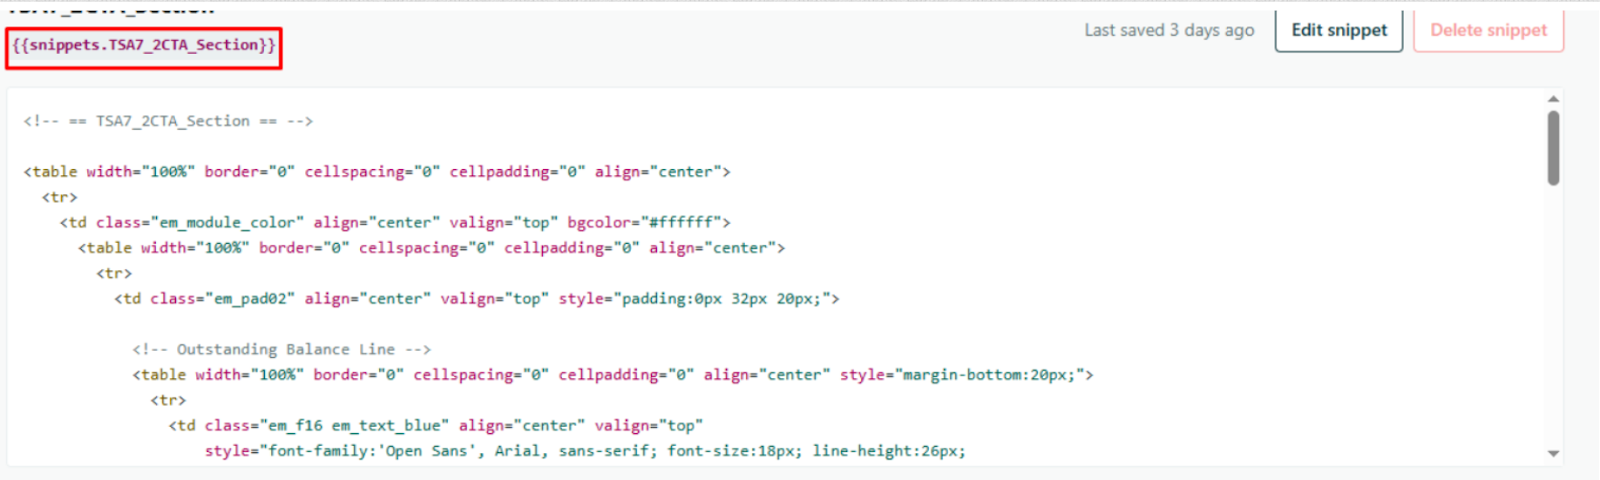
They allow brands to centrally manage recurring content—such as footers, legal disclaimers, or custom code—so updates are instantly reflected wherever the Snippet is referenced. Snippets reduce manual updates and ensure consistency across communications. This is why many teams rely on reusable snippets in Customer.io to simplify template creation.
Why use snippets?
Implementing Snippet templates delivers several benefits:
- Consistency: Maintain the same version of critical messaging (like CAN-SPAM legal text or company branding) everywhere with zero manual replication.
- Efficiency: Update shared content centrally, and the change propagates across all emails using the Snippet.
- Scale: Manage hundreds of campaigns with minimal overhead, an essential tactic for any business growing its marketing automation.
Common uses include universal footers and headers, dynamic legal disclaimers or privacy links, multi-language content blocks, and company contact details or dynamic logo blocks. With Customer.io’s personalization snippets, these use cases can go a step further by dynamically adapting content for individual users.
How to implement snippet templates in Customer.io?
1. Start with the coding
When creating your email template:
- Write clean, responsive HTML and CSS for both mobile and desktop.
- Structure the code in block-wise sections using <table></table> tags.
- Turn each block (for example, header, CTA, or footer) into a snippet.
- Save multiple snippets so they can be reused and swapped later.
This approach makes your email template modular and also much easier to maintain—perfect for building an HTML snippet template from scratch.
2. Upload Snippets in Customer.io
Once your code is ready, upload your snippets:
- Go to Content → Snippets.
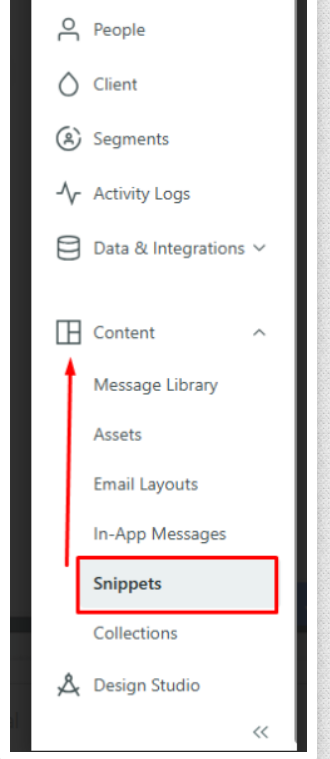
- Click Create Snippet and paste in your table code.

- Give it a clear name (for example, Header Block).
- Save it and repeat for all snippets.
Now you have a library of Customer.io email template snippets ready to be reused.
3. Create the email layout
Next, create a layout that will hold your snippets:Go to Content → Email Layouts.
- Go to Content → Email Layouts.
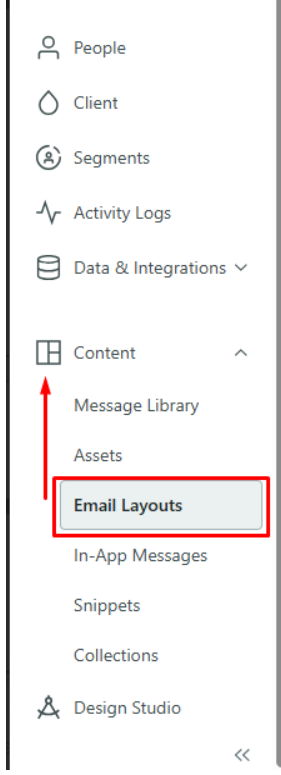
Alt tag – creating email layout option
- Click Create Layout → Start from Scratch.
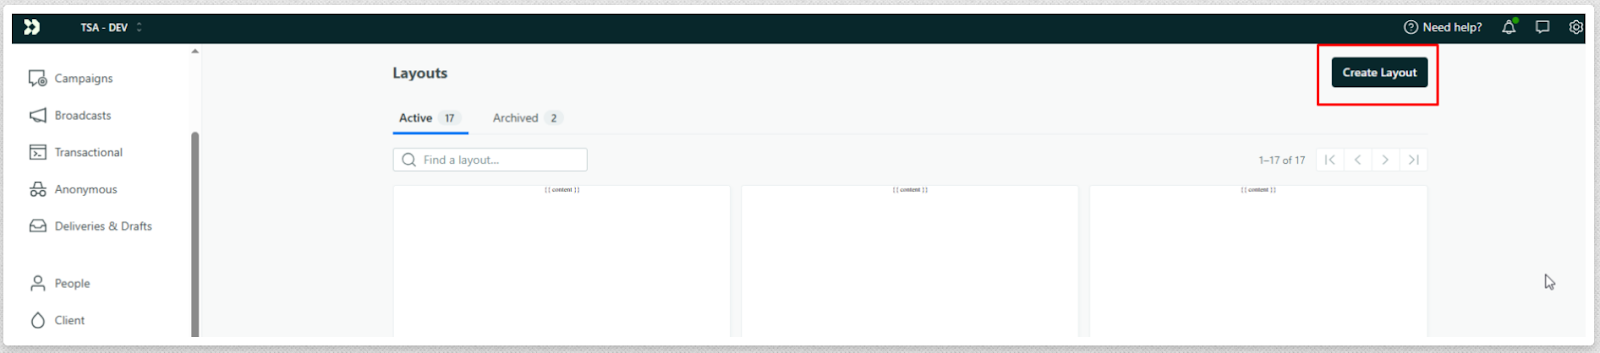
- Name your layout and paste in the main code (without snippets).

- Insert {{ content }} where snippets should appear.
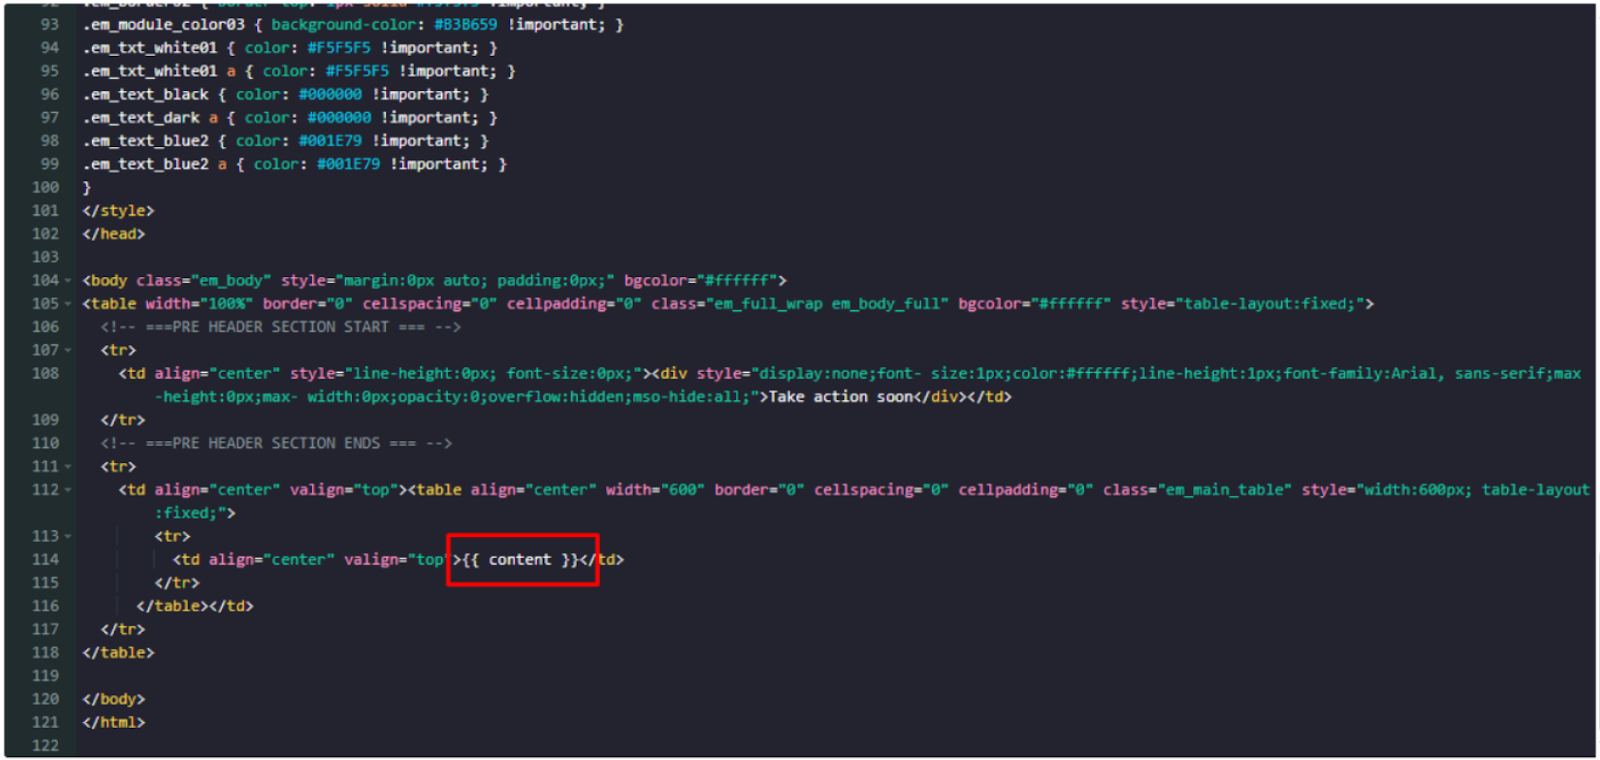
This creates a flexible framework where you can plug Customer.io’s code snippets in later.
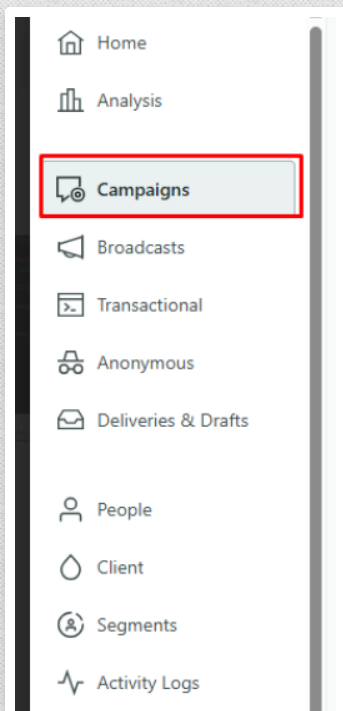
4. Build a campaign using Snippets
Finally, put it all together inside a campaign:
- Go to Campaigns → Create Campaign.
Add an Email Block and select your layout. (The screenshot below shows the blank layout that appears when we create a new campaign from an already created template. By default, it displays a blank layout, and then we need to add a snippet in the black box. The preview will be reflected on the right side.)
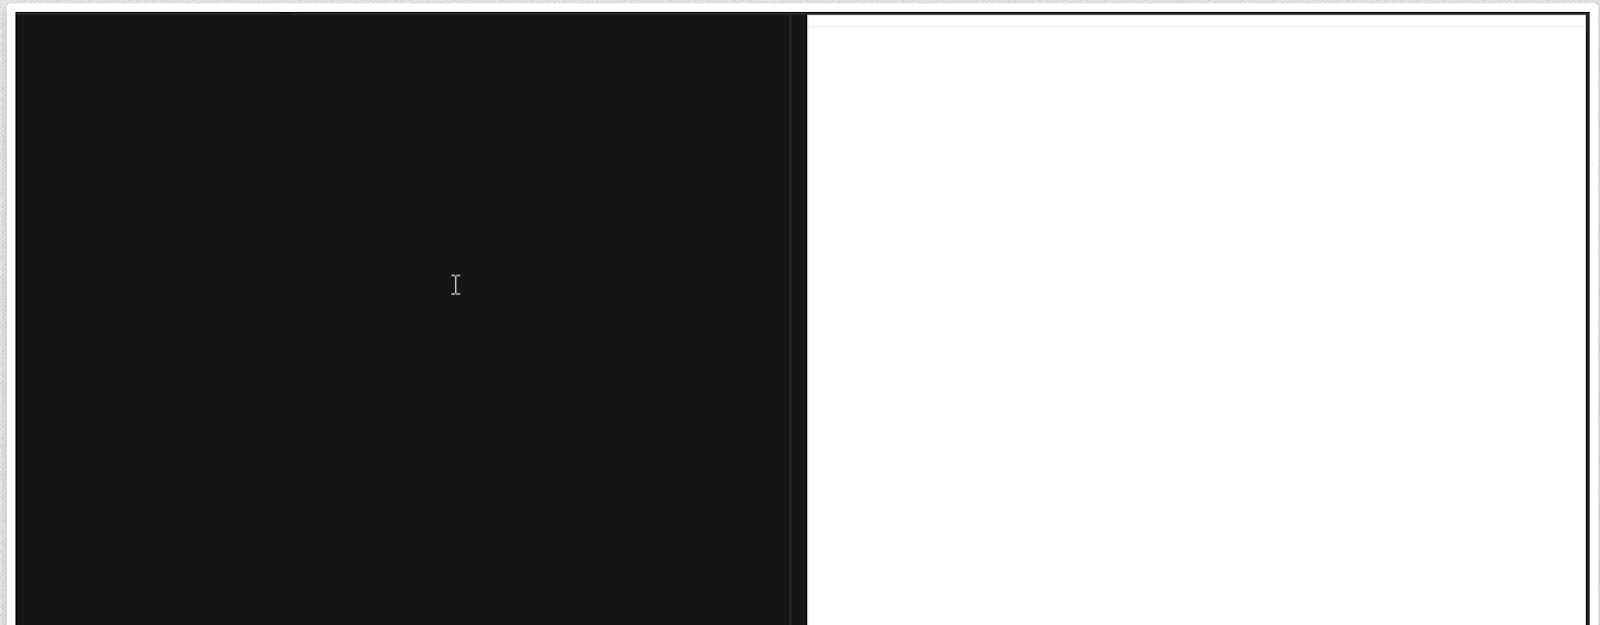
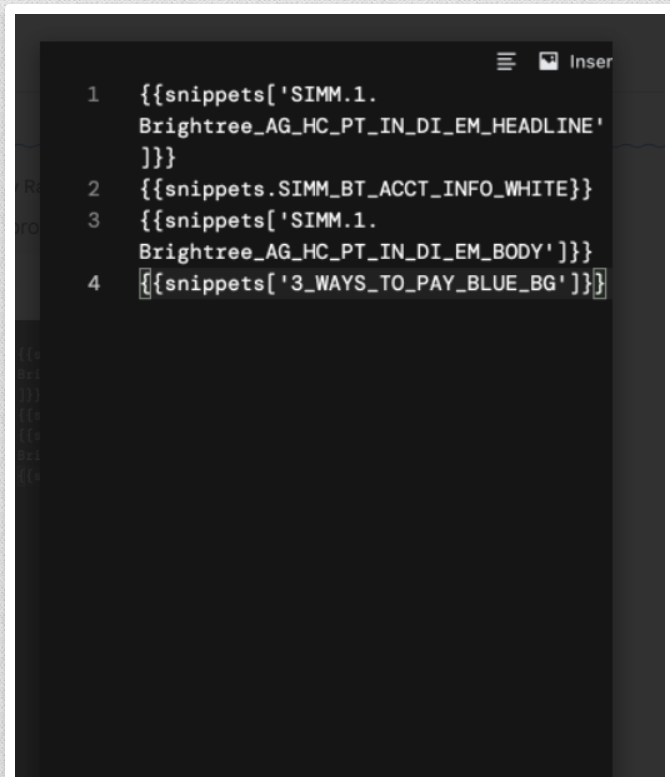
- Insert snippets into the blank space.
- Preview the design and save your campaign.
You now have Customer.io’s campaign snippets set up, ready to send.
Features of Snippets in Customer.io
Customer.io snippets are powerful, but understanding their capabilities and constraints is key to using them effectively. Here’s a breakdown of what you can do, and what to watch out for:
- HTML and Liquid: Snippets support both HTML and Liquid code, allowing you to create dynamic content such as personalizing a message with a customer’s ID. This makes Customer.io’s dynamic snippets incredibly useful for hyper-personalized email campaigns.
- JSON Data: You can store JSON data within a snippet and use Liquid to iterate over it, which is handy for features like displaying a random greeting or dynamic list content.
- Size Limit: Each snippet has a default size limit of 16kb.
Restrictions to keep in mind:
- Renaming: Existing snippets cannot be renamed; creating a new snippet is required if a name change is needed.
- Variable scope: Snippets cannot access variables that are defined solely within the message body.
- JSON arrays: Liquid code inside a JSON array in a snippet will not render as expected; it will appear as plain text.
With proper snippet template implementation and snippet management in Customer.io, teams can overcome these limitations while keeping workflows streamlined.

Closing thoughts on Snippet templates
Snippet templates in Customer.io empower teams to work smarter, not harder. By centralizing recurring content, building modular layouts, and leveraging dynamic HTML and Liquid code, marketers can deliver consistent, scalable, and highly personalized emails without getting bogged down in repetitive coding tasks. While understanding the limitations is important, the flexibility and efficiency gained far outweigh the learning curve.
If you’re ready to take your email marketing to the next level, we can help integrate snippet-based templates into your workflow—streamlining production while keeping your campaigns consistent and engaging. Let’s build your modular email system together. Get started!