

In an environment where marketing teams are expected to move fast without compromising quality, having templates that adapt to changing needs can make all the difference. That’s where Marketo shines. Beyond its automation capabilities, Marketo gives marketers the freedom to build and update campaigns with confidence through highly editable templates. So whether it’s swapping images, adjusting layouts, or refining branding elements, editability turns templates into living, flexible tools that support both consistency and creativity.
This blog post explores how you can leverage that power to streamline your workflow and deliver better experiences, every time.

Why Editability Matters
Understanding the value of editability in Marketo templates helps teams work more efficiently and deliver better customer experiences:
- Editable templates enable faster campaign launches by letting marketers update content, images, and CTAs without rebuilding the layout.
- They maintain consistent branding by preserving colors, fonts, logos, and overall visual style while allowing content updates.
- They reduce reliance on developers by empowering non-technical users to manage and update campaigns independently.
- They also support personalization and dynamic content, allowing teams to tailor emails or landing pages for different segments without recreating layouts.
Marketing teams can adapt quickly, produce higher-quality campaigns, and maintain a smoother, more collaborative workflow across the entire marketing ecosystem.
Editability in Marketo Email Templates
We’ll walk through how to manage image, text, and color controls in your Marketo templates
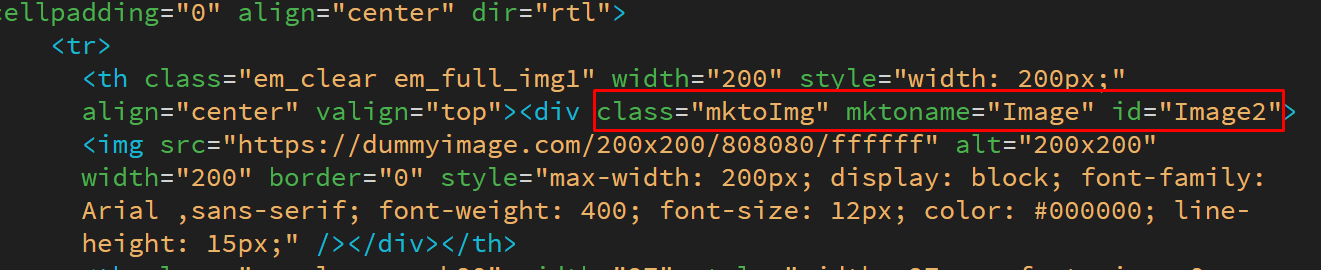
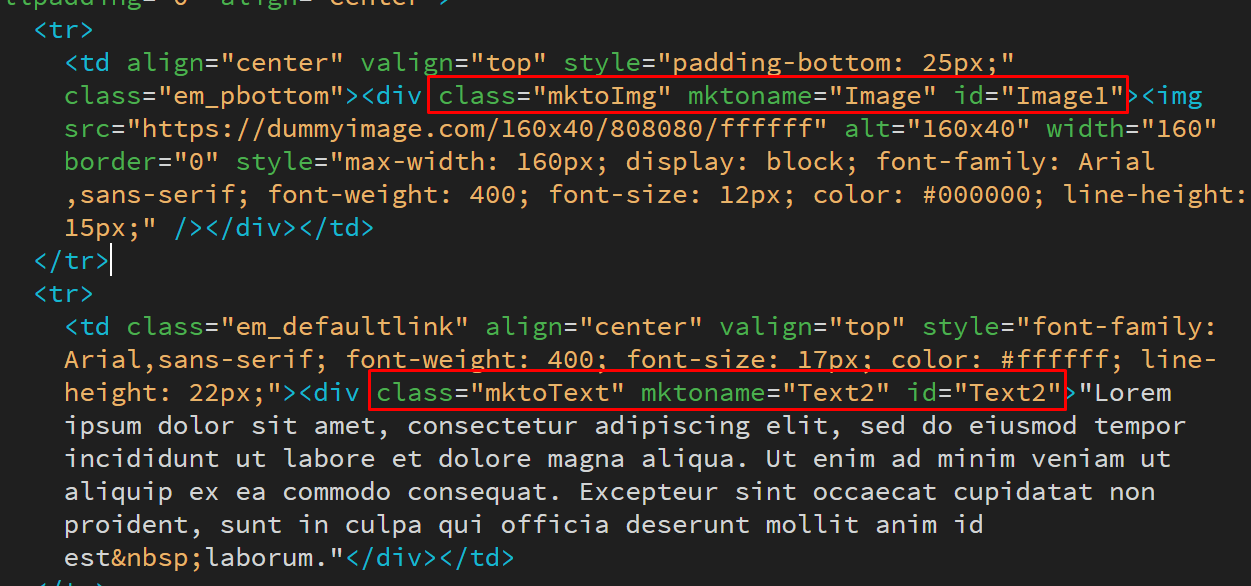
1. Image editability
Add class=”mktoImg” mktoname=”Image” id=”Image2″ and ensure that the id is unique across the entire template, as shown in the following snippet.
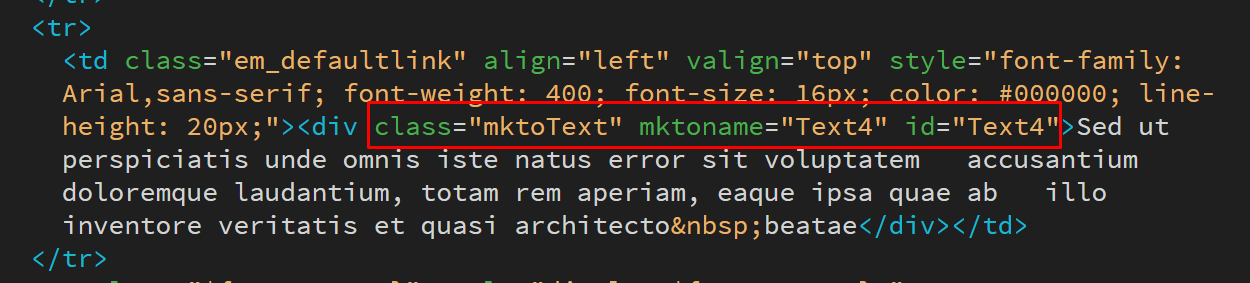
2. Text editability
Add class=”mktoText” mktoname=”Text4″ id=”Text4″ and ensure that the id is unique across the entire template. Check out the following snippet of code.
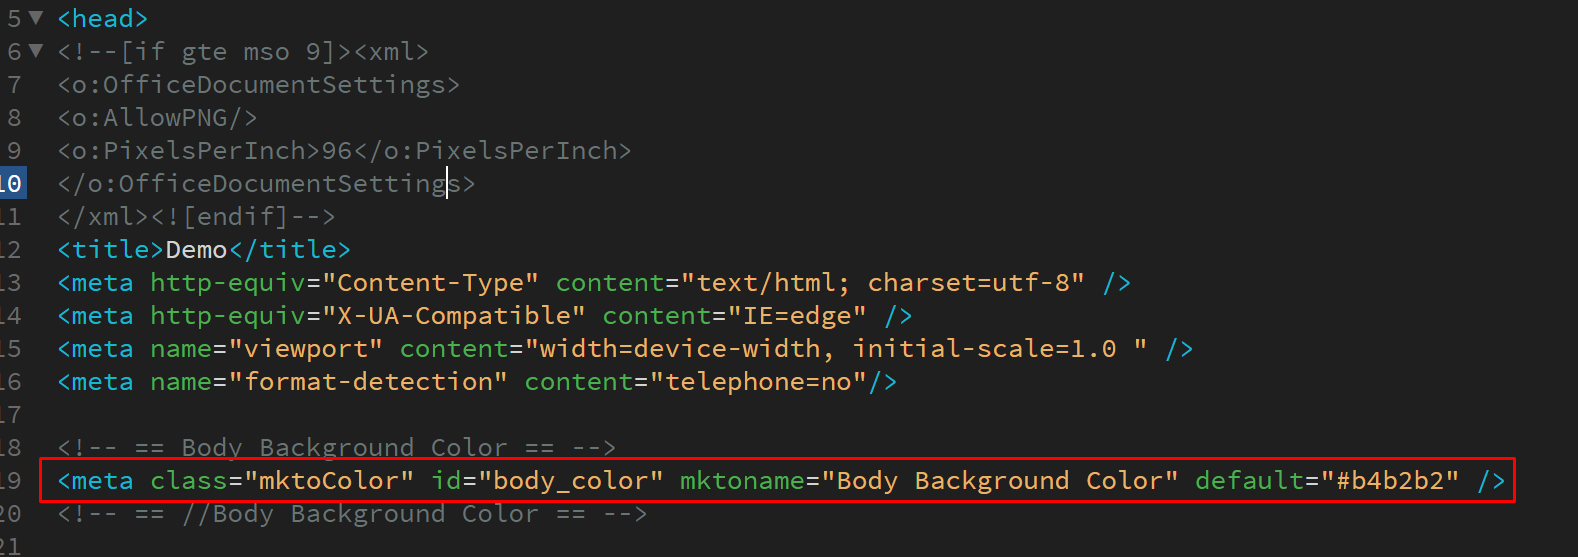
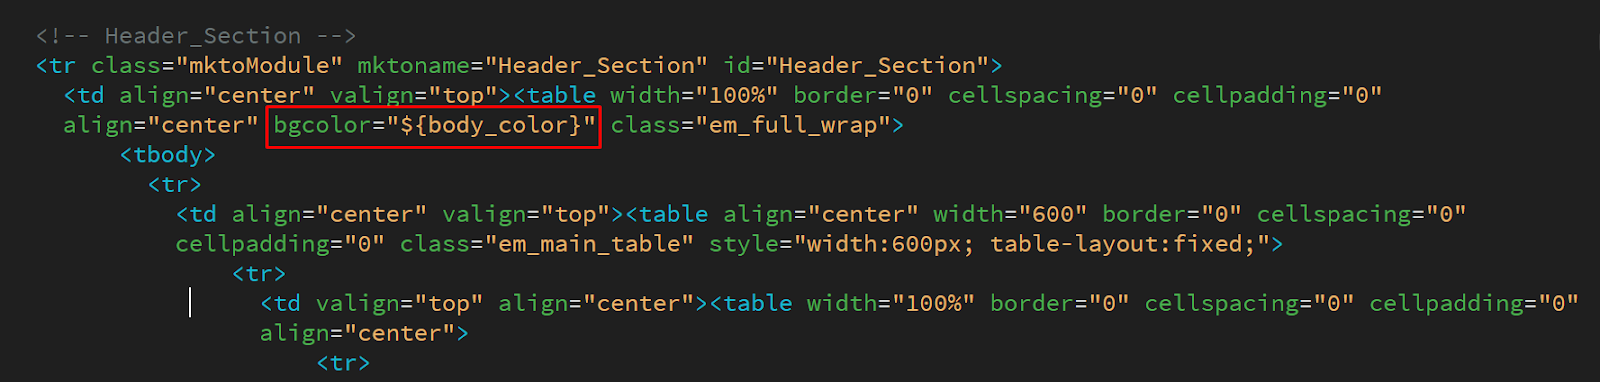
3. Global background color
Add <meta class=”mktoColor” id=”body_color” mktoname=”Body Background Color” default=”#b4b2b2″ /> inside the <head>, and in the code add ${body_color}.
4. Individual background color
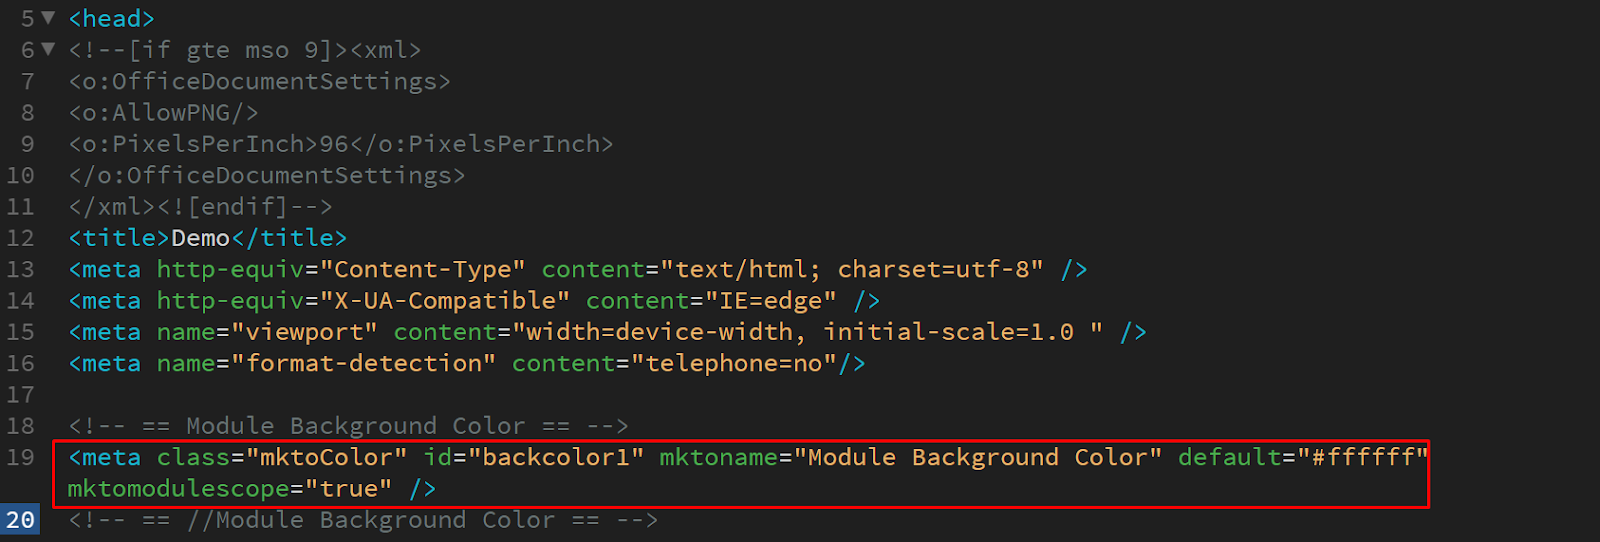
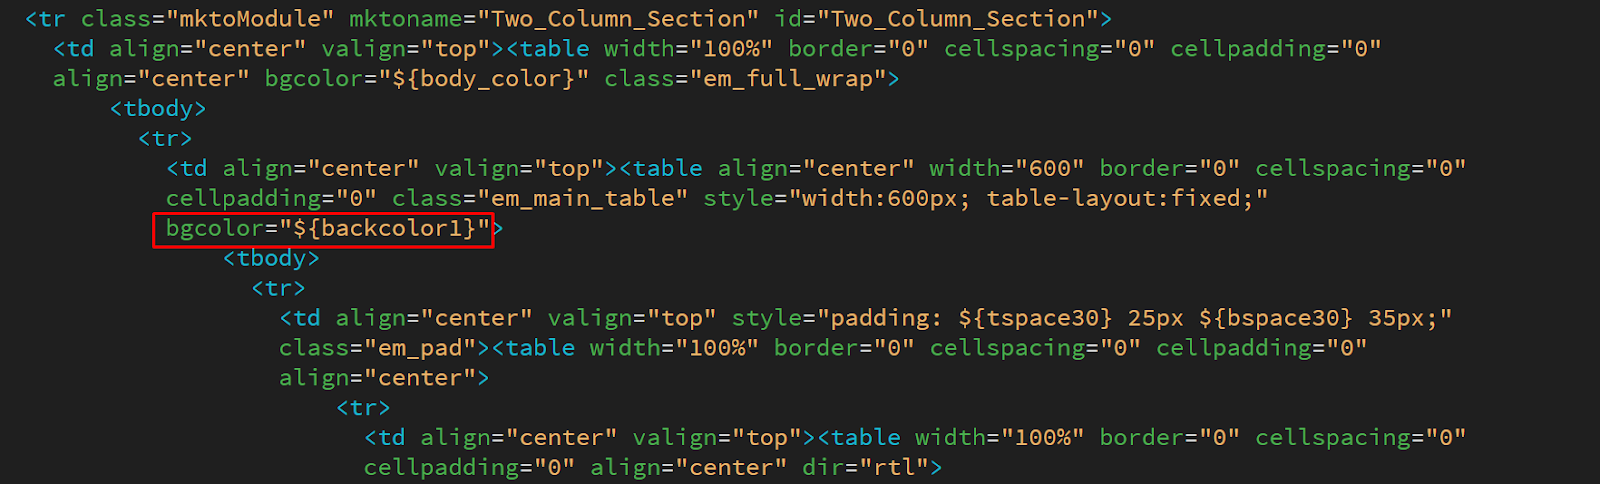
Add <meta class=”mktoColor” id=”backcolor1″ mktoname=”Module Background Color” default=”#ffffff” mktomodulescope=”true” /> inside the <head>, and in the code add ${backcolor1}.
5. Adding Space between Two Modules
Adjusting the space between modules enhances readability and brand consistency by providing a balanced visual flow.
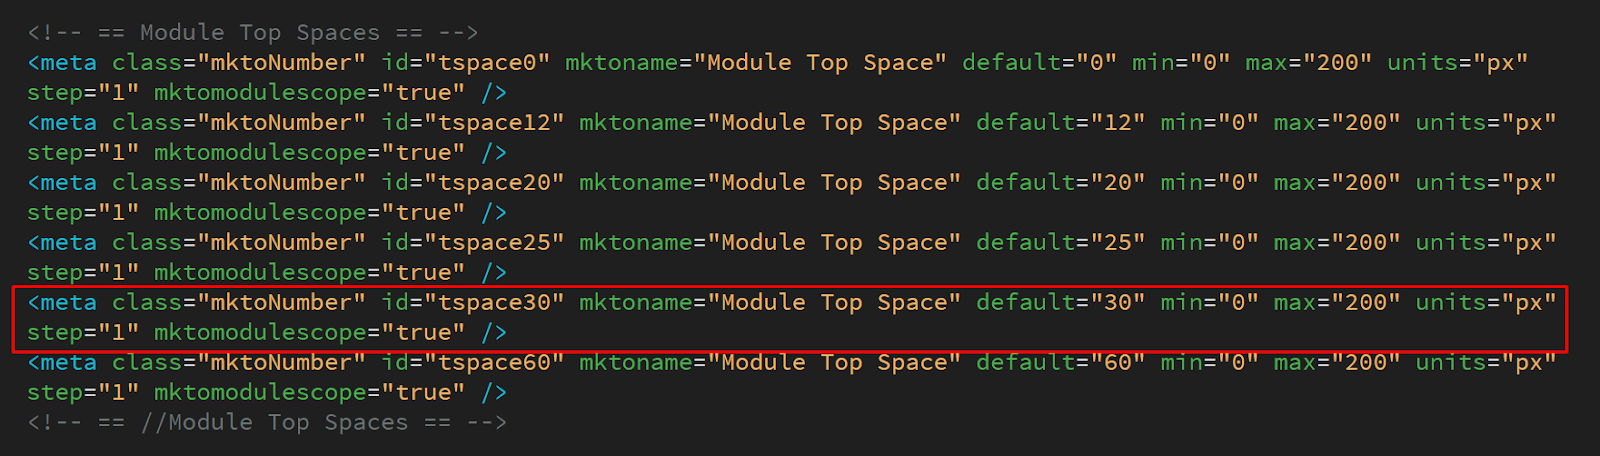
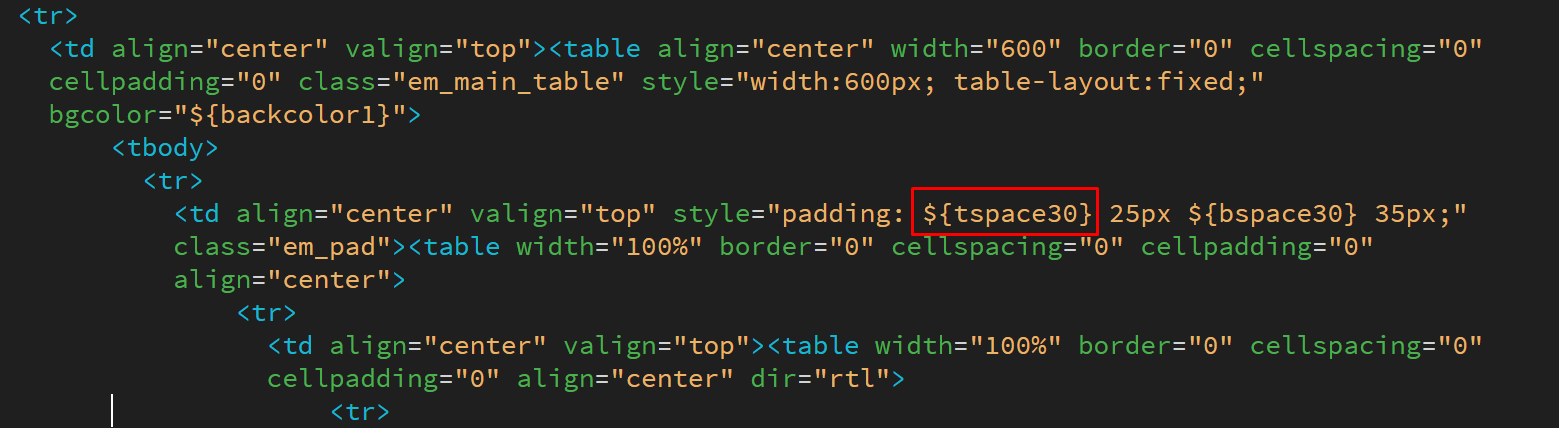
Add <meta class=”mktoNumber” id=”tspace30″ mktoname=”Module Top Space” default=”30″ min=”0″ max=”200″ units=”px” step=”1″ mktomodulescope=”true” /> inside the <head>, and in the code add ${tspace30}.
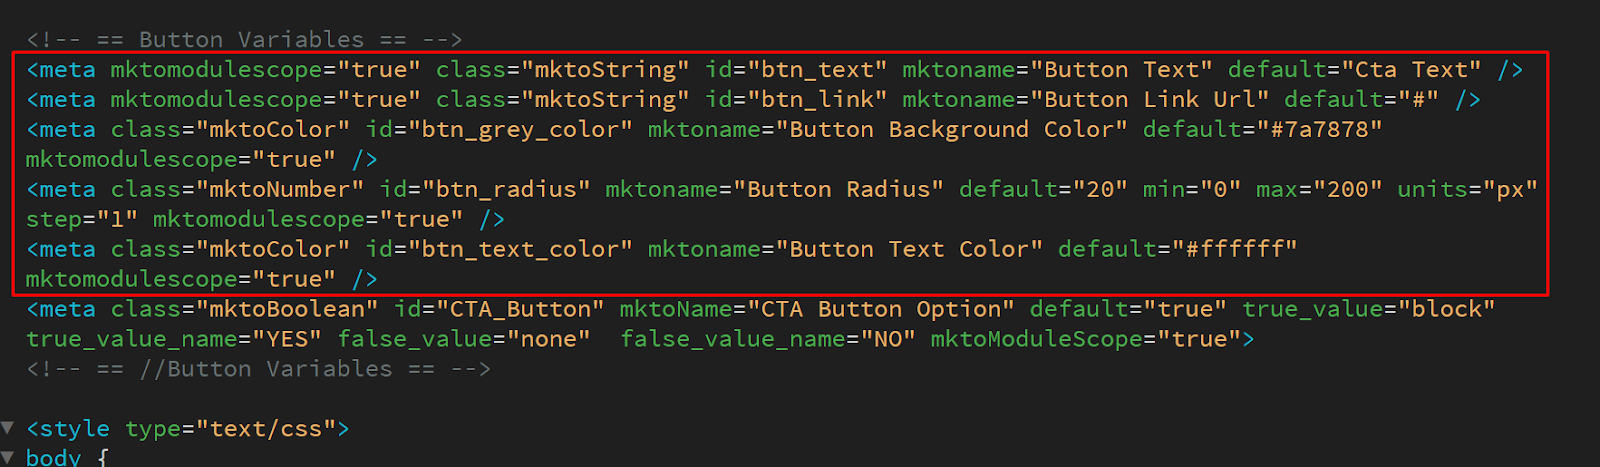
6. Editing Buttons
Marketo allows button elements to be fully customizable through editable attributes added directly in the template setup:
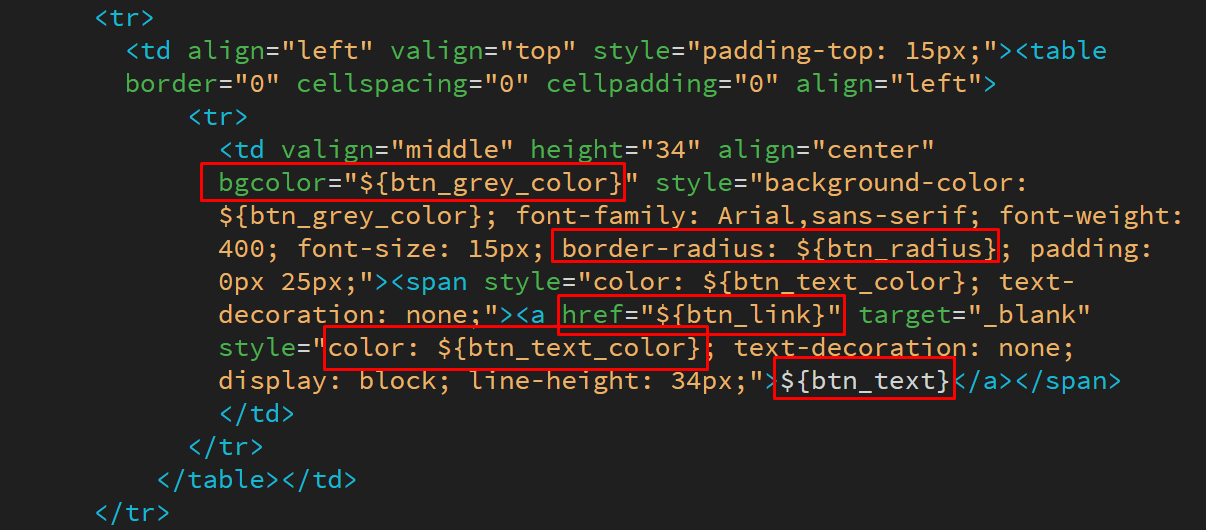
- For editing button text, add <meta mktomodulescope=”true” class=”mktoString” id=”btn_text” mktoname=”Button Text” default=”Cta Text” /> inside the <head>, and in the code add ${btn_text}.
- For editing a button link, add <meta mktomodulescope=”true” class=”mktoString” id=”btn_link” mktoname=”Button Link Url” default=”#” /> inside the <head>, and in the code add ${btn_link}.
- For editing the background color of a button, add <meta class=”mktoColor” id=”btn_grey_color” mktoname=”Button Background Color” default=”#7a7878″ mktomodulescope=”true” /> inside the <head>, and in the code add ${btn_grey_color}.
- For editing the button radius, add <meta class=”mktoNumber” id=”btn_radius” mktoname=”Button Radius” default=”20″ min=”0″ max=”200″ units=”px” step=”1″ mktomodulescope=”true” /> inside the <head>, and in the code add ${btn_radius}.
- For editing the color of the button text, add <meta class=”mktoColor” id=”btn_text_color” mktoname=”Button Text Color” default=”#ffffff” mktomodulescope=”true” /> inside the <head>, and in the code add ${btn_text_color}.
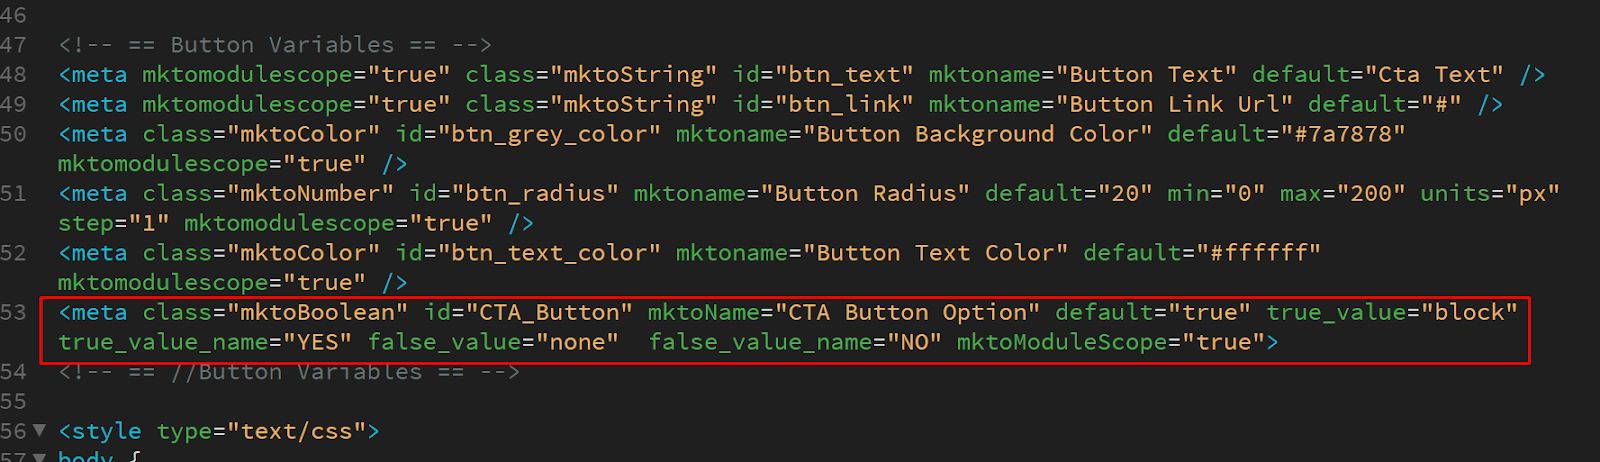
- Finally, for button ON/OFF editability, add <meta class=”mktoBoolean” id=”CTA_Button” mktoName=”CTA Button Option” default=”true” true_value=”block” true_value_name=”YES” false_value=”none” false_value_name=”NO” mktoModuleScope=”true”> inside the <head>, and in the code add class=”${CTA_Button}” style=”display:${CTA_Button};”.
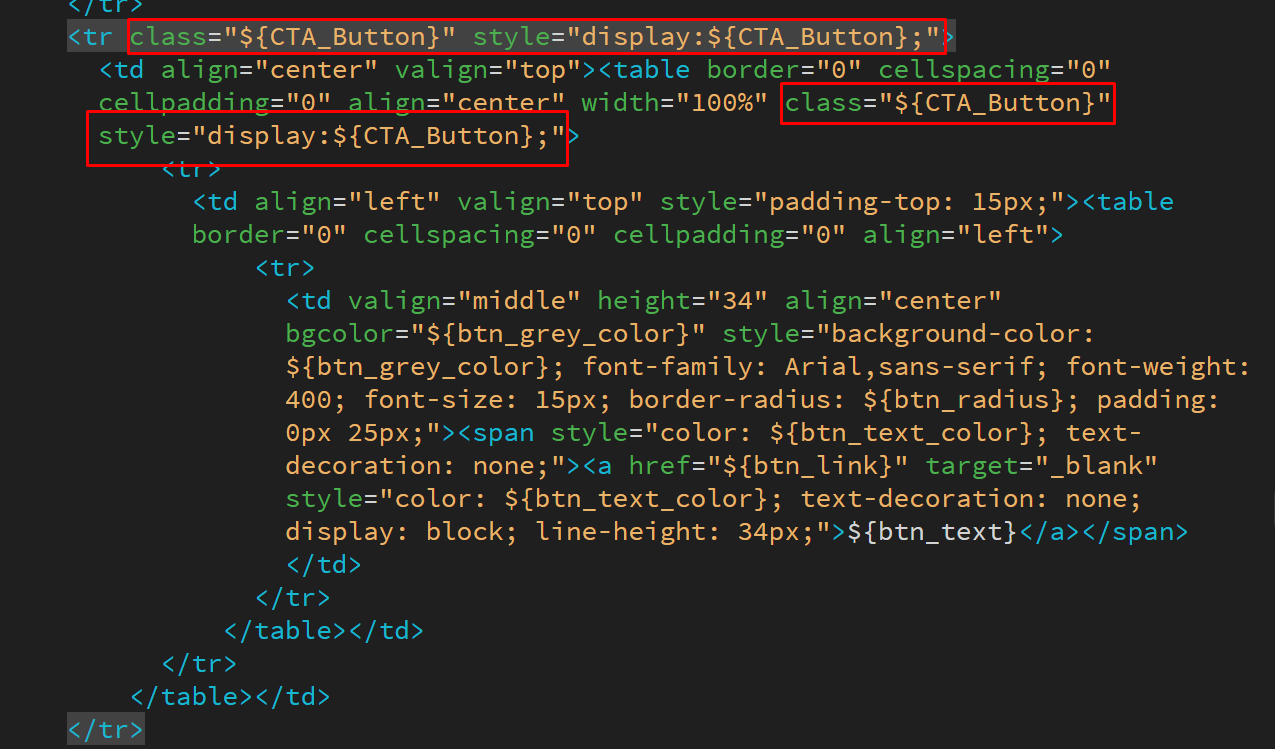
With these editable controls in place, buttons become modular, adaptable components that can be quickly tailored to fit any campaign’s design or purpose.
Key Features of Editable Marketo Templates
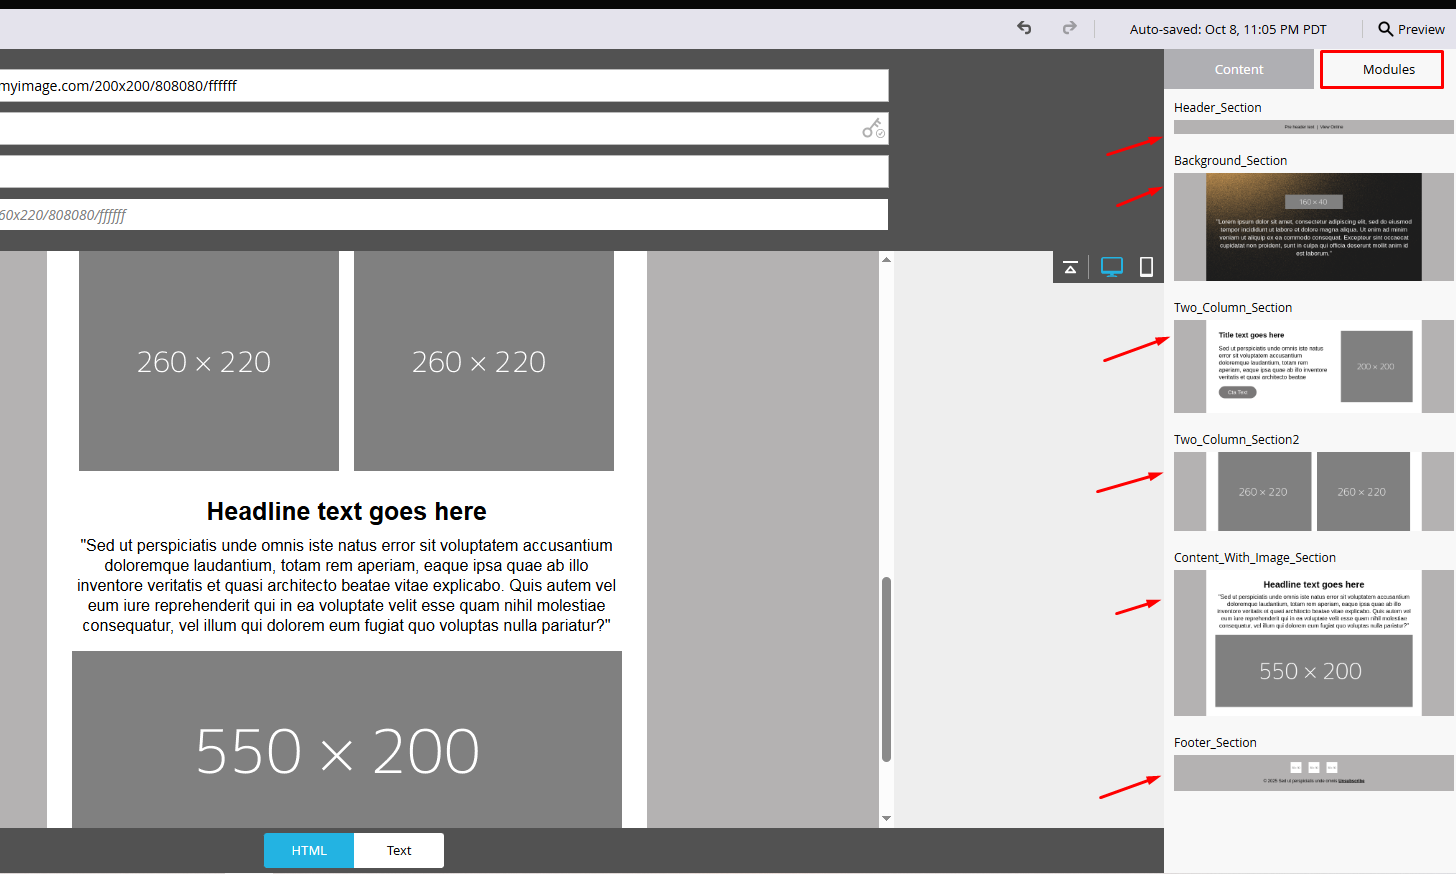
1. Drag-and-Drop Modules
Marketo templates support modular design, allowing users to move, add, or remove sections effortlessly:
- You can add modules using drag-and-drop by selecting any module and placing it anywhere in the template.
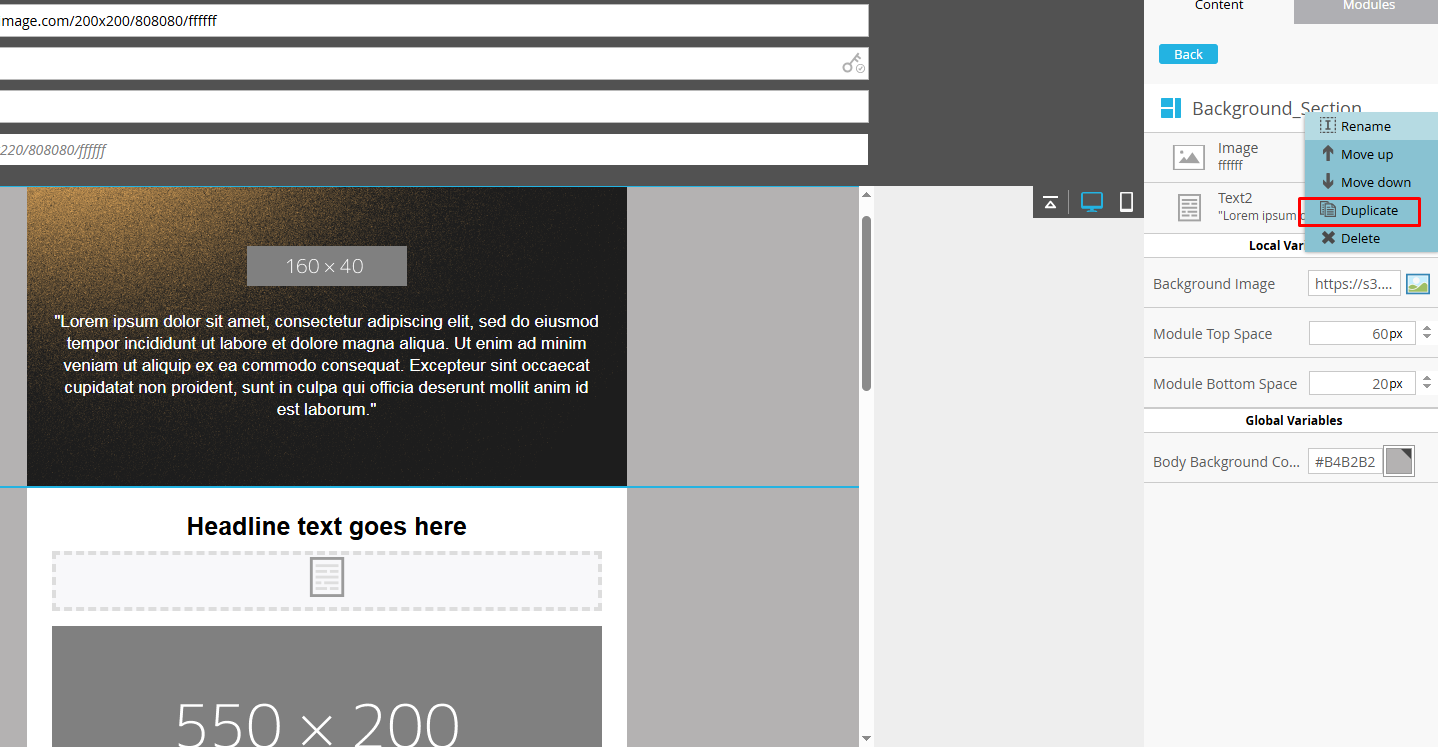
- You can duplicate a module by opening its settings and selecting Duplicate.
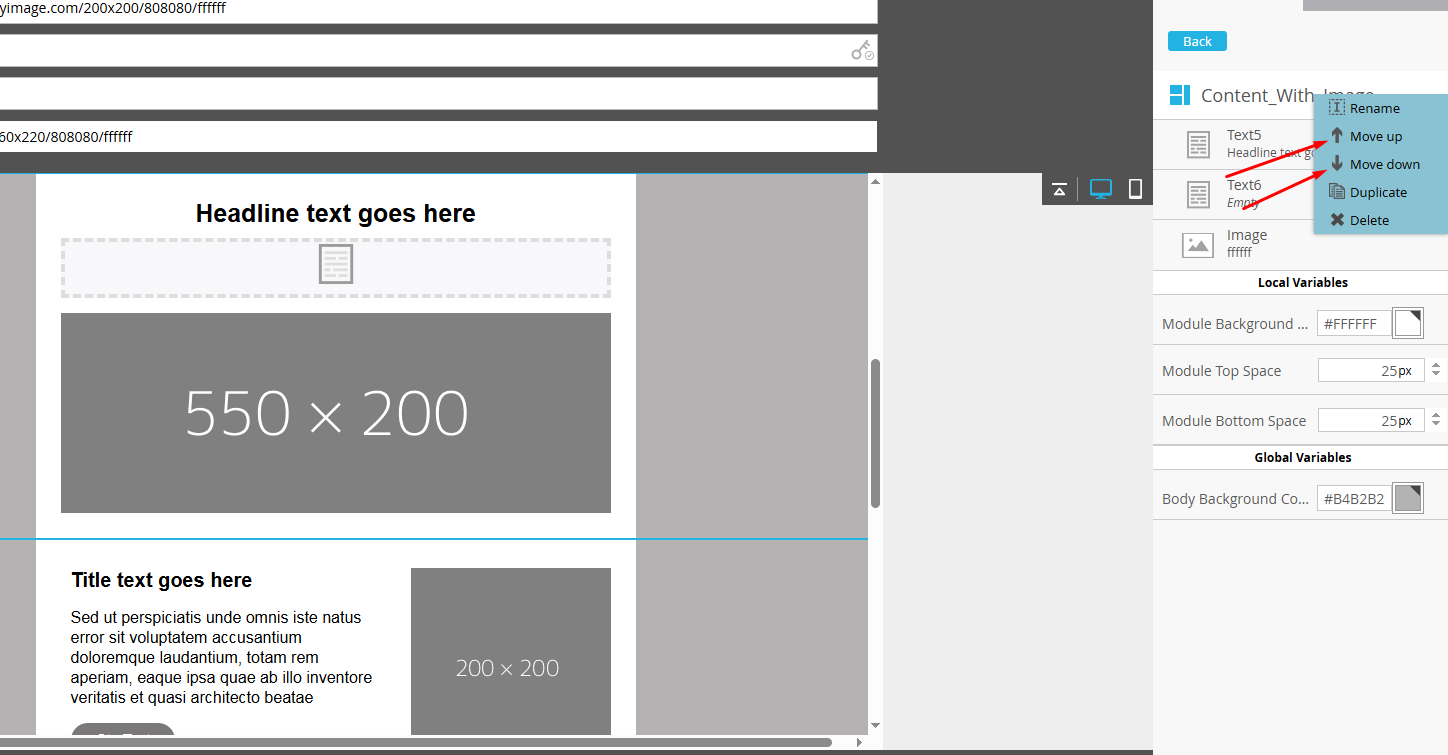
- You can move a module up or down by opening its settings and choosing Move Up or Move Down.
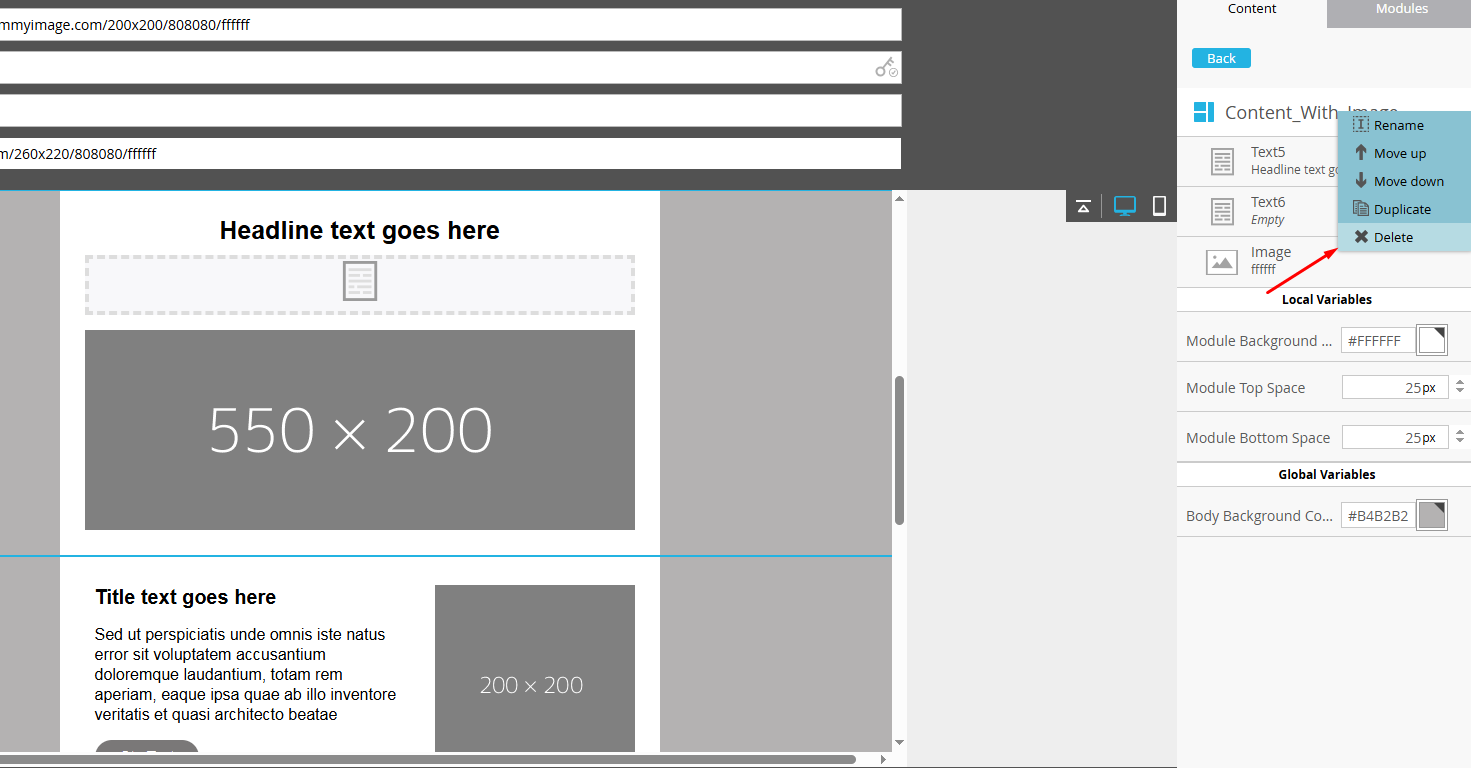
- You can delete a module by opening its settings and selecting Delete if it’s no longer needed.
2. Lockable & Editable Sections
Certain sections can be locked to prevent changes (e.g., headers, footers, branding), while content areas remain editable. This ensures that while the campaign operations person can change the button text or URL, they cannot change the brand color, thus maintaining mandatory brand consistency across all marketing assets:
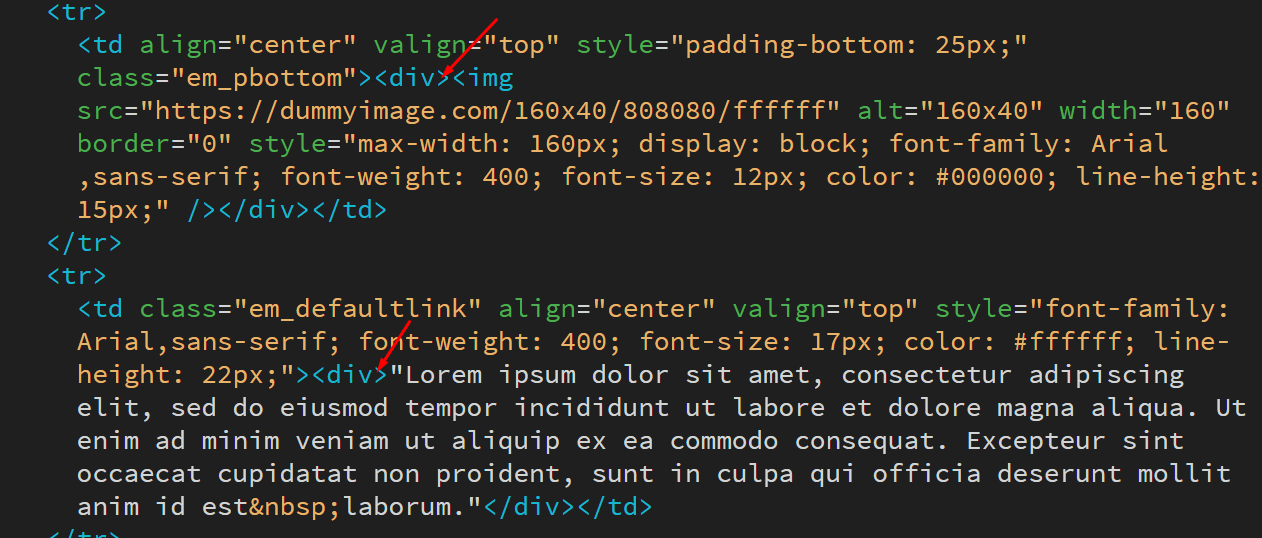
- For editable sections, add class=”mktoText” or class=”mktoImg” along with mktoname=”Image” and an id such as Image1 to the text or image element.
- For sections that should remain locked, do not add class=”mktoText” or class=”mktoImg” with mktoname and id; simply leave them blank.
3. Reusable Components
Templates can include reusable snippets or smart blocks that automatically populate with personalized data. To use a pre-created snippet, open the settings of the text block and select Replace with Snippet.
4. Responsive Design
Editable templates ensure content adapts smoothly across all devices, keeping emails and landing pages consistently mobile-friendly.

Best Practices for Editable Marketo Templates
To get the most out of editable templates in Marketo, keep the following guidelines in mind:
- Plan your template structure by defining which sections are locked and which are editable to maintain brand integrity while allowing flexibility.
- Use clear naming conventions for blocks and modules so marketers can easily identify editable areas.
- Test across devices to ensure edits in editable sections don’t affect the design.
- As far as email deliverability is concerned, make sure to balance text and images, use branded tracking CNAME, include unsubscribe links and physical address.
- Validate all content before sending, especially AI-generated.
Wrapping Up!
Marketo’s editable email templates go way beyond simplifying production; they unlock faster experimentation, smoother collaboration, and more refined customer experiences. When teams can update content without diving into complex code, they free up time to focus on strategic thinking instead of technical tasks. By applying the techniques we’ve shared, you’ll not only boost efficiency but establish a scalable foundation that grows with your marketing ambitions.
Ready to elevate your Marketo workflow?
Begin by making your templates as adaptable as the campaigns they support. And if you need a hand, our Marketo experts are here to help. Let’s get started!